Showing posts with label Heartfelt Thanks. Show all posts

Thursday, March 19, 2009

Two cards

My kids are sick, one is on antibiotics, so I'm not getting a lot of work done right now.

So! This first card is part of the blog candy I offered a couple weeks ago, but you can only see part of it. I had fun playing with this new set. It is sooo pretty! The white words ended up not as great as I envisioned, but hey, its alright. LOL

Supplies: Stamps: God's Beauty Ink: Chocolate Chip, Whisper White craft Paper: So Saffron, Close to Cocoa, Mellow Moss Accessories: So Saffron wide Poly-twill ribbon, Mat Pack, Dimensionals

This second card is a late birthday card from Sandra, off SCS. I think its a fun idea and I have all but the word stamps! Might have to try this sometime!

Supplies: Stamps: Heartfelt Thanks, Happy Everything, Canvas (retired) Ink: Not Quite Navy, Old Olive, Pumpkin Pie Paper: Vanilla, Not Quite Navy, Old Olive Accessories: EE Buttons, vanilla grosgrain ribbon

Sunday, December 7, 2008

Edelweiss?

Since the Cinema Challenge was The Sound of Music and my favorite song by far is "Edelweiss", I went with that! Plus...I have flower stamps that I can make white... haha!

I have this music box that plays Edelweiss and I saw plenty engravings of it in Germany and Austria (like this below) but I wasn't sure I'd seen the actual flower. Sooo I googled it! Check it out: Edelweiss

And here's my creation!

Supplies: Stamps: Heartfelt Thanks, Warmest Regards (retired) Ink: whisper White Craft, Versamark, Sage Shadow, Chocolate Chip Paper: Close to Cocoa, Sage Shadow card stocks Accessories: White Embossing Powder, Heat Tool, Stamping Sponge

Thursday, September 18, 2008

Best Card!

Here's the story behind this card. I was browsing Bev's fabulous blog (she has great blog candy right now!) and she had a link for a guest design team "call" on Katharina's blog. The only thing you had to do was make a card using one of her sketches. Being the "sketch-junkie" that I've recently become (LOL!) I browsed her sketches and love them!!! Sooo I made this card!

Katharina owns Whiff of Joy Stamps which are really sweet images Bev shows a lot of (because she is on the design team!). And YES, I am going to enter it! This is crazy...! I must really like how this card turned out because I would never picture myself doing that! ACK! haha....

Supplies: Stamps: Boho Backgrounds, Heartfelt Thanks ~ Ink: Close to Cocoa, Not Quite Navy, Always Artichoke ~ Paper: Not Quite Navy, Close to Cocoa and Very Vanilla card stocks ~ Accessories: Mat Pack, Silver Brads, Stamping Sponges, 1 3/8 inch circle Punch, 1/2 inch circle Punch, Word Window Punch, Dimensionals

Tuesday, September 9, 2008

Little Lamb, Birthday & Thanksgiving!

In spite of working on other projects and having too much going on yesterday, I managed to get some stamping done last night!!! Hooray! LOL! Recently our friend's daughter was baptised and we had to miss it. I thought we could still send her a card so this is what I made, using Julee's Mojo Monday Sketch #52. I thought this lamb image was perfect for the occasion and took my card colors from the way I colored it. Somewhere I saw the lamb done in So Saffron, so that's what I did here. This is also a 4 1/4 square card.

Supplies: Stamps: Pun Fun, Warmest Regards Ink: Basic Gray, Baja Breeze Paper: Baja Breeze, Creamy Caramel, Pink Pirouette, Whisper White card stocks, So Saffron Prints DP Accessories: Watercolor Wonder Crayons, Blender Pens, Subtles Brads, Stamping Sponges, Pink Gingham Ribbon

I used Lauren's Saturday Sketch for the design behind my grandmother's birthday card. I totally cheated on that square focal point....I used my big square punch for the Pumpkin 'frame', and then used it to make reference points on the stamped paper, and then used my exacto knife to cut out the Vanilla piece with the flowers! (You get creative when you don't own all the fun tools- no second-larger square punch! LOL!)

Supplies: Stamps: Heartfelt Thanks, Sincere Salutations Ink: Pumpkin Pie, Old Olive, Close to Cocoa Paper: Old Olive, Close to Cocoa, Pumpkin Pie & Very Vanilla card stocks Accessories: Big Square Punch, Old Olive wide grosgrain ribbon

My final card uses a cool technique I'd never tried! The sketch is from Jen's Saturday Sketch and the reason I thought of this particular technique (Joseph's Coat) is because Andrea just did a tutorial on her blog HERE. I had to take the modifications a step further because I also do not own the brayer. My mom does...! Anyway, so here's a fancy Thanksgiving card!

Supplies: Stamps: Lovely As A Tree, Holidays & Wishes, Canvas Ink: More Mustard, Tangerine Tango, Ruby Red Paper: More Mustard, Ruby Red, Glossy card stocks Accessories: Round Tab Punch (sides trimmed off!), Pewter Hodgepodge Hardware Kit, Stamping Sponges, Clear Embossing Powder, Heat Tool

And just because inquiring minds want to know.... THIS is a heat tool.

You plug it in, heat it up for a few seconds and point at your embossing powder til it melts. Super cool technique!

Thursday, September 4, 2008

Two Workshops

With school going, I can now offer my morning and evening workshops and classes, which I think works better for a lot of people. However, that means I demonstrate twice as much... That's fine with me *wink* but I still like to mix it up a little.

So! Here are my two chalkboard technique cards:

Supplies: Stamps: Heartfelt Thanks ~ Inks: Whisper White Craft, Old Olive, Chocolate Chip ~ Paper: Chocolate Chip, Old Olive, So Saffron, Certainly Celery, Pink Pirouette ~ Accessories: Stampin' Pastels, Subtles brads, Chocolate Taffeta Ribbon

And here are my Fresh Cuts Notes. I just love these and not all of my customers have seen them, so I get to keep showing them off! I also really love how well Chocolate Chip goes with our new In Colors!

Supplies: Stamps: Fresh Cuts ~ Inks: Chocolate Chip, Baja Breeze ~ Paper: Fresh Cuts Notes, Tangerine Tango, Baja Breeze ~ Accessories: Chocolate Taffeta Ribbon, Whisper White Ribbon, Stamping Sponges (to dye ribbon), Button Bouquet

I did two other projects (one more per group) but one I really didn't like (poor girl who had to watch it-it was one that worked a lot better in my head.) and the other is a tag I will post when I get the gift ready to go with it. I would have demo'd that too, but I forgot to buy part of it. Sigh...I really like LISTS, you'd think I'd write everything I need on a list! haha...!

Anyway, if you weren't able to attend yesterday but you wanted to place an order, I plan to close the party Monday. Just get me your order and money by then! Thanks!

Tuesday, September 2, 2008

New Favorite Color Combination!

Since my new Baja Breeze ink pad arrived I HAD to play with it! I used Lauren's sketch which turned out to be super easy to make a plan for, but I thought up the piercing at the last second and that took some time. Mostly just because I'm a lazy stamper! haha! I think this turned out really nice tho.

And yes, this is my new favorite combo. Baja Breeze with brown! I've got some other projects in my head using the same combo, just had to wait for the ink to arrive! LOL!

Supplies: Stamps: Heartfelt Thanks, Sock Monkey Ink: Baja Breeze, Chocolate Chip Paper: Whisper White & Baja Breeze card stocks Accessories: Chocolate Chip Taffeta Ribbon, Mat Pack, 1 3/8 inch square punch, Dimensionals

Saturday, August 23, 2008

Beate's Back!

Woooohooooo! She is the whole reason I started doing sketches and challenges!

So! This card uses her sketch (which she got from Jenn Balcer). I also took the colors from her inspiration piece earlier in the week. Haven't stamped much this week... So here is my autumny card!

I do like the card, tho I'm not so in love with the chocolate sponging on the circle piece. Oh well. Like the sentiment? I figured since I was using such autumny colors anyway, may as well ink up a stamp I never have used... haha!

Supplies: Stamps: Boho Backgrounds, Heartfelt Thanks, Holidays & Wishes ~ Ink: Tangerine Tango, Chocolate Chip, Old Olive ~ Paper: Kiwi Kiss, Tangerine Tango, Chocolate Chip, Very Vanilla ~ Accessories: Chocolate Taffeta Ribbon, Mat Pack, Neutral Buttons, Making Memories circle cutter thingy... ;)

Monday, August 11, 2008

Bright Buttons!

I'm back! I know, you didn't even know I was gone! That's just how crazy things have been, but pre-scheduled posts help a lot!

Today's card comes from Lauren's Saturday sketch. I tipped mine sideways tho. I liked the idea of buttons for those circles so you have to go with colors of buttons you have! I don't use these colors much so I had lots of Green Galore and Lovely Lilac! So those are the colors of paper and ink I used too! Turned out alright tho.

The brand new catalog will be up on the Stampin' Up! website today after noon! It is gorgeous! If you want a copy of your own just let me know!

Also, I need your $5 and RSVP for the card class listed on teh side. I just need to get the supplies ordered and here and there's going to be quite a rush on the company with the new catalog items! Yeay!

Saturday, July 12, 2008

A Mojo Saturday!

It took a while, but I got to participate! I even used the Meet the Diva's color challenge! That kind of made it easy- colors and sketch were already done, (all from Julee's blog!) and I only have a couple tall stamps to choose from so here's what I did:

So Saffron base, and mat for the main image, Chocolate Chip card front, Pumpkin Pie wavy part, Old Olive ribbon and they all show up in the stamped image too!

Can you see what I did with the flower? A very forgotten technique- actually watercoloring with my Watercolor Wonder Crayons! Duh! Sheesh! I was sitting there wishing I could do the Rock & Roll technique backwards, having the darker shade on the inside of the petals when it hit me- I used to use the crayons this way! So I had to find my watercolor paper, colored on the stamp itself, spritzed the paper with water and voila! Cute cute. And easy!

I also used my Hodgepodge Hardware on this card. If "this finish" is going away, I may as well use it up. Then maybe I'll need more! LOL!

Friday, June 6, 2008

Workshop Projects

Here are two cards made at my workshop this evening. First, we broke into the new Fresh Cuts note cards. Literally- I cut the pkg open while talking about it! It was fun! We made very different cards but they were so cute! So for mine, I punched out the die-cut petals, stamped the Wild Wasabi foliage along the side, stamped the big stamp with Groovy Guava ink on an angle, added a 3 1/2 x 3 /12 square of Wild Wasabi card stock to the inside front cover, and added some Wasabi double-stitched ribbon on the side. Cute, fun and super fast! This card is almost exactly the same as another workshop project, but I used different colors and left off the ribbon. I have a Chocolate Chip base, and the bottom half of the card is colored in Pretty In Pink Prints paper from the hostess pack. The focal point is Chocolate Chip ink layered on Pretty in Pink card stock, layered on Regal Rose card stock. This shows the chalkboard technique, which is sooo cool to show off! (I used the two pink shades of chalk) And finally I added a pink Square Fire Rhinestone brad! Anyway, it was lots of fun tonight! If you were interested in placing an order I am now keeping it open until Wednesday evening. There is a catalog link on the side or you can call me to see an actual catalog.

Wednesday, June 4, 2008

Be Inspired #16

Its bright, but I like it! I wasn't sure I would, since the colors were not quite what I had in my head (you have to use what you own, not what you haven't bought yet!) but it turned out alright!

its loosely based on Beate's inspiration piece. How'd you like that?! LOL! I did the grid on the main image because of the shelves, and I picked River Rock for the walls, Soft Sky for the blue and the Pumpkin Pie and Rose Red from the flowers on the shelves. I sponged some Pumpkin ink on the edges of the flower piece and I have this River Rock double stitched ribbon. The flower comes from Heartfelt Thanks and the greeting is from Fresh Cuts.

Friday, May 23, 2008

Teacher Gift- Completed!

Here is the gift for my son's teacher. (Now that she has it!) I've already shown the frame and the card, but here it is together! The other night I had to track down a gift sack. It was ridiculously huge, but it was all I could find last-minute! I stamped it to match the gifts! (almost- used Pumpkin Pie ink instead of Summer Sun, the yellow didn't show up on the brown bag) I don't know if I've ever done a themed gift unless it was a wedding shower... Anyway, this was a lot of fun for me! The rolled up scroll is a thing about teachers. I printed it off onto some patterned paper that I definitely hoard...I've had a stack of it for probably 6 years now! But I rolled this up neatly and tied it with Certainly Celery grosgrain ribbon, which also matches! haha! Anyway, for anyone curious, here is the thing about teachers. It was posted on the demo chat area of the Stampin' Up! website by Jaynell Giliberti. I thought it was great for our first school teacher, maybe you know someone you could share it with.
GOD CREATED TEACHERS On the 6th day, God created men and women. On the 7th day, God rested. Not so much to recuperate, but rather to prepare for the work to do on the next day. For it was on that day-the 8th day-that God created the first teacher. This teacher, though taken from among men and women, had several significant modifications. In general, God made the teacher more durable than other men and women. The teacher was made to arise at a very early hour and to go to bed very late - with no rest in between. The teacher had to be able to withstand being in a classroom, for many hours, with energetic and very impressionable children. The teacher had to be available for any unforeseen needs children may need, when away from home. Yes, God made the teacher TOUGH, but GENTLE too. The teacher was equipped with soft hands to wipe away the tears of the neglected and lonely students and provide them with God’s encouragement. To be available for children going through emotional changes in their lives, as they grow older and mature. The teacher was also equipped with organization and firm discipline to keep children in order. God poured a generous amount of PATIENCE into the teacher. Patience when a student asks to repeat the directions, the teacher has just repeated for someone else. Patience when one-half of the class fails the test. Patience when the student’s textbooks or homework was left at home or unfinished for the next days’ lessons. The patience for a teacher to give that extra help to the students with special needs. God gave the teacher a HEART slightly bigger than the average human heart. For the teachers’ heart had to be big enough to love the kid who needs someone to talk to or a shoulder to cry on. And to love the kid who runs out of the classroom at the end of the day without so much as a 'good-bye', let alone a 'thank you'. And lastly, God gave the teacher an abundant supply of HOPE. For God knew that the teacher would always be hoping. Hoping that the kids would someday learn how to read and spell, hoping each child will mature and lead a productive life, and hoping for deliverance. When God finished creating the teacher, he stepped back and admired the work of his hands. And God saw that the teacher was good. Very good! And God smiled, for when he looked at the teacher, he saw into the future. He knew that the future is in the hands of the teachers.

Monday, May 19, 2008

Inspiration Station!

No, not me, sorry. But all three of these come from other people's sketches and/or inspiration posts! (thanks guys!-LOL!) This first one comes from Lauren's color challenge. And you had to use a circle! So I did! I used Night of Navy for the base of the card and stamped everything in Night of Navy ink...because it was already out! I have a Whisper White card front and I actually cut out the frog and dragonflies. Wow...there's a reason I never do that! The frog is on Old Olive card stock and the dragonflies are Barely Banana. The big circle is of Cool Caribbean card stock and then a smaller one of White. And some Old Olive wide grosgrain ribbon goes across the top. Oh and I colored the eyes with my white gel pen.

This one is my take on Jen's Saturday Sketch To Try. Its a White card base with a rectangle of Chocolate Chip on one side, the yellow side of some Petals and Paisley paper on the bottom half of the other side and the matching Celery striped Prints paper on the top half. This card coordinates with my frame gift found here. So I used the very same inks for the flower and dragged...drug? the one side of the White focal piece across my Chocolate Chip ink pad to get that hint of brown along the edge. Then I added three Vanilla buttons. I think it coordinates well with the gift and was easy to make. This is from Julee's Mojo Monday sketch. I have a Close to Cocoa base, then my panels are Pretty in Pink and Barely Banana. I stamped the tiny flower from Priceless on those panels using the inks that match. Oh...and I guess it doesn't quite match the sketch...hmm... Anyway, I tied that layer with Pink gingham ribbon. Then for the top layer, I have a Cocoa mat beneath the White. I stamped the image from the For A Friend set in Pretty in Pink and colored the little flowers Banana. I dragged the white square in the Banana ink on all sides again, and tied more pink ribbon with a Clear round button around that one! I got a LOT done today! Good for me! haha! Hope you can say the same!

Wednesday, May 14, 2008

A Gift!

Here is one of the projects I've been working on. Oddly, it took about an entire day to settle on a color for the flowers! Then I had to get an opinion on the ribbons... I put waaay too much effort into this one! But I am happy with how it turned out, so I guess that's what matters!

I bought this small black frame that actually ended up too big for my original idea, maybe that's why it took so long to figure out what to do! Anyway, I stamped the flowers on Whisper White card stock with Summer Sun blossoms and Certainly Celery stems, and used Chocolate Chip for the center. That way they can be Black-Eyed Susan or Sunflowers, depending on the recipients preference. I matted that onto Chocolate Chip card stock and layered the whole thing on some Celery Prints Paper. Then I added three bits of ribbon to the side of the frame. That's trickier than I thought because you have to bend the ribbon around the inside of the frame to allow for the glass and everything to go back in! Not so much fun...and maybe there's an easier way to do it...hmm....! But I used some old Stampin' Up! yellow, I think it was called Maize grosgrain, and then Black Gingham ribbon, just knotted on the side.

Here's a close-up:

So it works! I'm going to make a coordinating card to go with it, and I'm debating something else like maybe a stamped candle...I don't know. Something cute tho! haha!

Monday, March 24, 2008

Making Cards!

I mentioned I was at my mom's helping make cards. Next summer she is going to chaperone a foreign exchange group and she is giving bundles of hand stamped cards to the mothers and grandmothers in the homes she visits (most of whom will not speak English, which is why we left off greetings!). We made over 20 cards in two days this weekend, and that's really significant when you realize we had to keep an eye on my kids and everything else that comes up in life... So here are three of my favorite cards. I'll post more another time. This one uses Heartfelt Thanks. Its such a beautiful set and you can use the same image over and over in all kinds of colors and shades. For this card, I went with a Pumpkin Pie base, a layer of Bravo Burgundy, and a layer of Very Vanilla cardstocks. I stamped the outline flower in Burgundy along the side. I stamped the flower in Burgundy, a Pumpkin center and Always Artichoke for the stem. I tied some retired burgundy organdy ribbon around it for a very nice, simple accent. This card uses another of my favorite but retired stamp sets: Time With You. I thought a nice, springy card would be great, so I chose Gable Green for the base. The main image is on Whisper White, stamped in black and colored with Stampin' Up! markers. Then just a little black gingham ribbon to finish it off! This card was really cool. My mom did this one. First we did the polished stone technique on scraps of photo paper. We used the retired Copper ink refill with Summer Sun and Cameo Coral. She layered them onto a Summer Sun card base, stamped the image from Lovely As A Tree in Basic Black and added some black brads from the Vintage Brads set! Cool, huh?!

Sunday, March 16, 2008

A workshop!

Lots of photos today! I had a workshop on Saturday that we were out of town the whole weekend for. It wasn't 'all work and no play' tho - Burt and I got to go out for our Valentines/birthday date! We had a very nice night out, loved it! The following pictures are the projects I did at my workshop. This first one uses the Chalkboard Technique. Beate has a great tutorial on that at Splitcoaststampers.com. Her sample is also on her blog, Fresh & Fun, on my side bar. I used Chocolate Chip like she did, rather than black. Anyway, the card has a chocolate chip base, the So Saffron Prints Paper, a layer of Pumpkin Pie, then So Saffron, then Chocolate Chip cardstock. I used White Craft ink to stamp the flowers (from Heartfelt Thanks), and then sponged over them with my pastels. I tied Chocolate Chip Taffeta ribbon around the layered rectangle and added a Fire Square Rhinestone Brad for an accent. Sooo fast, sooo stunning! My second card I used the stamp set Priceless. I was going to show the So Swirly jumbo wheel with the set because of the upcoming Stampin' Up! promotion, but I forgot to bring the wheel with me. (I'll post details on that tomorrow. It doesn't use this set, but the idea behind sets and wheels...) So I have Bravo Burgundy for the base, then a layer of Almost Amethyst, then Pretty in Pink. I stamped the heart with Burgundy and cut it out, and stuck it on with Dimensionals. Then I wrapped a little bit of White Grosgrain ribbon around the pink and used my Easter Elegance Rub-on's on the ribbon! how cool is that?! Oh, I didn't use Versamark here, I used the actual colors of ink that match the paper. 
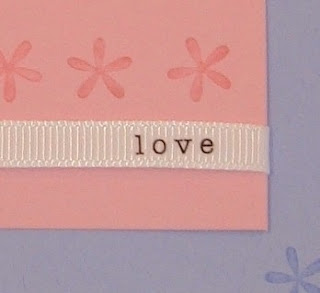
Here is a close up with the Rub-ons. It came out really clear and looks fantastic! This card was the Make & Take. I used the Sale-A-Bration set So Many Scallops here, with the Rock & Roll technique. That has got to be one of my favorites because its so simple but looks great! We used the crimper for the leaves, as found on Patty's website (also on my side bar). I let them choose either Cameo Coral or Ruby Red for the base, since those are the inks we used on the flower. Then a layer of Creamy Caramel, and then Old Olive for the stem and leaves. We added a cute little Caramel button in the center.

Friday, February 22, 2008

Weekend Sketch Challenge #36!

Two posts in one day...! I should have started using challenges and sketches a long time ago! I think my cards are looking a lot nicer nowadays! I know there's always that evolution as you learn new things and trends change but still! Here's my card using Beate's sketch:

Just as I was finishing gluing it all down, my little boy came up with what he'd been building with Lego's and asked if I liked his newest creation. Of course I did, and I told him so, then I asked what he thought of my newest creation. Keep in mind this boy loves to stamp... he looked it over and finally said "Well, its fine, but its not a creation Mom." Whatever! It is totally a creation! And I'm very happy with it!

I used Sage Shadow as my base, then white layered onto Chocolate Chip cardstock. I used Rose Red for the flower to pop, and I really like how that worked out. I sponged Sage on the edges of the sentiment (which is one of my favorites!) and used some Chocolate Chip Taffeta ribbon, another favorite!

Related Posts Plugin for WordPress, Blogger...