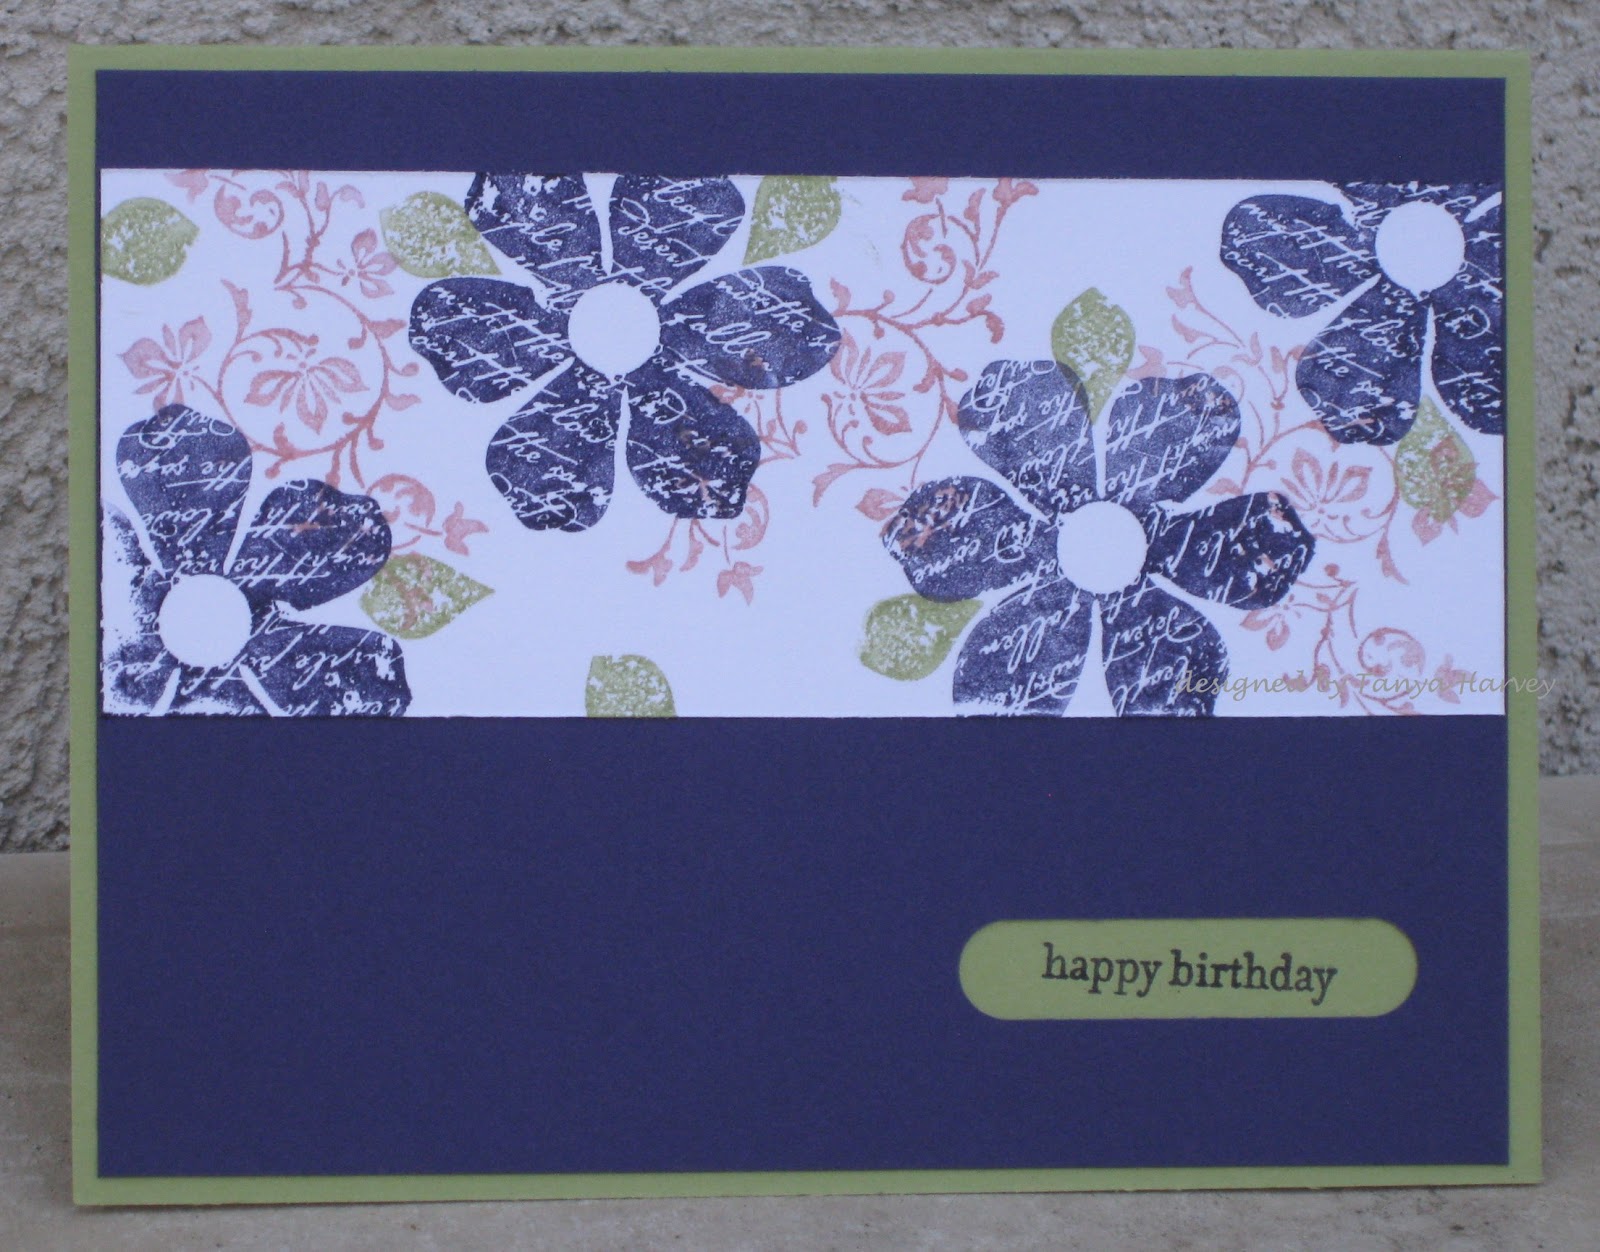
Isn't this dark blue DP fun? I think so! Today I used Jen's May SFYTT and the new DP, card stock and ribbon from yesterday! hee hee!
Supplies:
Stamps: Lean On Me, Teeny Tiny Wishes
Ink: Basic Black, Midnight Muse marker
Paper: Summer Starfruit, Midnight Muse & Whisper White card stock, Patio Party DP
Accessories: Whisper White stitched grosgrain ribbon, Watercolor Wonder Crayons, Blender Pens
Saturday, May 19, 2012
Friday, May 18, 2012
Springy Sneaky Peeky
I took some time last night to get a few cards put together, which means I'll have things to show you for a couple days at least, LOL! I didn't think May was super busy for us, but these last two weeks of school sure are! On top of everything else that's usually going on...!
This card shows a sneaky peek to some new DP, card stock and ribbon that's in the braaand new catalog! I used the sketch from Stamping 411 to design this card. And I do love this stamp set...I'm so glad its sticking around!
Supplies:
Stamps: Forever Young
Ink: Early Espresso
Paper: Primrose Petals & Whisper White card stocks, Patio Party DP
Accessories: Stitched White Grosgrain Ribbon
Find more:
Forever Young
Wednesday, May 16, 2012
Original Note Cards
THIS is exactly what I have been looking for! I need a quick way to do notes and this looked perfect!
I had an order arrive just before I dove into the dvd project and I hadn't managed to toss the packing paper yet! yeay!! (talk about a silver lining...I'm cheering for clutter??)
So today I really needed to send some notes off and I threw these together. here's what I created.......
I chose not to monogram the notes but to use stamps instead. I figured that with the crumpled paper, a nice dose of Smooch Spritz would be the perfect touch. I punched out the bird shape and the Decorative Label Punch shapes and laid them on the note cards and sprayed away...but the bird was really hard to notice. I stamped in the less-spritzed areas, and where I laid the punched pieces. I don't know if you can really tell, LOL. Everything I used has either recently retired or is about to.
Supplies:
Stamps: Vintage Vogue (retiring), Faith in Nature (retiring), Fresh Vintage (retired)
Ink: Raspberry Ripple, Soft Suede, More Mustard, Wild Wasabi, Gumball Green, Island Indigo
Paper: packing paper from the Stampin' Up! orders!
Accessories: Log Cabin Smooch Spritz (retiring!), Decorative Label Punch, Bird Punch
Check it out and link back if you give it a try!!
Find more:
Faith In Nature,
Fresh Vintage,
Vintage Vogue
Sunday, May 13, 2012
Happy Mother's Day!
I hope everyone is having a wonderful Mother's Day! I've certainly had a great day. I got to sleep in, my daughter and husband made me blueberry muffins from scratch, my kids had sweet homemade gifts ready for me, and I even got a nap after church!
For once I remembered to mail out cards on time! That included having my kids make Mother's Day cards for their grandmothers on time too, lol! My kids haven't wanted to stamp much in recent years, so when I told them they could make a card, use one I already had, or just write a letter, I was surprised they both wanted to stamp their own. Out came all the stamps and inks, and here's what they created!
My daughter started the same way they always used to stamp - very colorful and random...
My son created this...
and then this...
so she imitated his design with this....
I was very impressed with this designs. And of course the grandmothers we're thrilled!
Tuesday, May 8, 2012
Pages from a video
I haven't posted in 14 days! I am so sorry! I have crafted a ton, believe it or not. My grandmother passed away and I was put in charge of sorting thru pictures and creating a slideshow to play at the viewing and funeral. That was on top of the busy work week I had, all the other things I needed to do, and the funeral itself required a 12 hour drive (and 12 hours back) for a 4 day stay, wherein I had a crazy bad allergic reaction to something in a bean burrito from this grandmothers favorite restaurant in the world. It made for quite a whirlwind week!
I created the slideshow on My Digital Studio of course. *grin. For one thing, I didn't want just photos. Both of my parents have received dvd's full of old family photos at similar events and when we looked at them, didn't know who half the people in the photos are, much less what they're doing or why. So sad!! I knew I'd be sending copies of this disk to all of my cousins and a few other people and I wanted them to know the significance of these photos. And even if they already do, they're children and grandchildren will need to know too, lol! So while I wanted to let the photos do the talking, I wanted journaling added to most photos, and a few embellishments to make the screen a little more interesting.
I created 125 frames, and we fit three songs into the background, ending at almost exactly 12 minutes. I worked on this project every spare minute I had last week to get it done on time. (4:30 am the day of the viewing...!) I discovered that using my camera with the flash setting off to snap a photo of the photos worked better in most cases than scanning. Then I had to edit the photos, then build the page and add the journaling. lol. Also I wanted the video to be as chronological as possible since that's the whole point- to feature her life.
When working with My Digital Studio, you can create your own project, without the layouts provided, but you can also select a photo layout within the project. One of the options, at least with the DVD project, is to have the photo fill the screen. I did that 11 times. This is my favorite full screen photo:
and here are a few other random favorite pages.....
my mom is one of those cute little girls.
my grandparents always showed their love for each other and I used 24 slides of just the two of them. They were married 57 years before my grandfather passed away.
That final page is the only slide that did not have her in the picture, but it captures the trips to the cabin and the way she created those trips for all of us grandkids.
Anyway, this is what has been keeping me busy. I have a class scheduled for this Friday so hopefully I'll have a chance to get some paper crafting done soon!
Find more:
1 Photo Layout,
3 Photo Layout,
My Digital Studio,
Scrapbooking
Sunday, April 22, 2012
Purple Elephant
The final card from my class today features this super sweet retiring stamp Elebration! This is the first time I've used it for a baby girl, or ya know, a toddler girl's birthday. Hence the pink and purple-ness, and isn't purple a cute shade for the elephant? I love it! I also like this fun way of emphasizing the sentiment by repeating it and making a pattern. So there you have it!
Supplies:
Stamps: Elebration, Teeny Tiny Wishes
Ink: Basic Gray, Wisteria Wonder
Paper: Wisteria Wonder, Regal Rose, Whisper White card stocks
Accessories: In Color Printed Brads, Mat Pack, Watercolor Wonder Crayons, Blender Pens, White Bakers Twine
Supplies:
Stamps: Elebration, Teeny Tiny Wishes
Ink: Basic Gray, Wisteria Wonder
Paper: Wisteria Wonder, Regal Rose, Whisper White card stocks
Accessories: In Color Printed Brads, Mat Pack, Watercolor Wonder Crayons, Blender Pens, White Bakers Twine
Find more:
Elebration,
My Classes,
Teeny Tiny Wishes
Saturday, April 21, 2012
Retiring In Colors!
This is another card from my class, and it features retiring In Colors! Every color you see here will be gone May 31, ...except of course the white. LOL! This card was inspired by the Mojo Monday sketch for this week, but I made it a collage panel instead of more CAS like the sketch. (see my staggered line of flowers? its there, I promise)
Supplies:
Stamps: Vintage Vogue, Teeny Tiny Wishes
Ink: Concord Crush, Blushing Bride & Pear Pizazz markers
Paper: Pear Pizazz, Concord Crush, Whisper White card stocks
Accessories: Word Window Punch
You know what? I didn't think that greeting was crooked until I edited this picture....wow... LOL!
Supplies:
Stamps: Vintage Vogue, Teeny Tiny Wishes
Ink: Concord Crush, Blushing Bride & Pear Pizazz markers
Paper: Pear Pizazz, Concord Crush, Whisper White card stocks
Accessories: Word Window Punch
You know what? I didn't think that greeting was crooked until I edited this picture....wow... LOL!
Find more:
My Classes,
Teeny Tiny Wishes,
Vintage Vogue
Friday, April 20, 2012
Embossing Daisies
Today was my card class! Here is one of the projects we made - all of the daisies are embossed! I think its appropriate for an orange or autumn wedding or shower gift, a birthday, or anything else a person may send a card for! It was inspired by the CAS sketch last week.
Also, both the Fifth Avenue Floral stamp set (flower) and the Sincere Salutations (words) are retiring soon! If you love them, order them soon!!!
Supplies:
Stamps: Fifth Avenue Floral, Sincere Salutation
Ink: Early Espresso, Versamark, Peach Parfait (for water coloring)
Paper: Peach Parfait, Early Espresso, Just Add Cake DP
Accessories: Blender Pens, Clear Embossing Powder
Find more:
Fifth Avenue Floral,
Sincere Salutations
Wednesday, April 18, 2012
Another Layout!
Wow- two in a row! Yippee!! This is for my class next week, and I just use two punches to make it! Its simple and quick but very cute, and isn't that grass clever?! That's the Scallop Punch punched twice, the second time its offset to make choppy blades of grass! (Another bonus of being a demonstrator and getting the Stampin' Success magazine!) I also used the same Simply Scrappin' Kit as yesterday, but with Pretty in Pink for the base.
(and a closeup for better detail)
Supplies:
Paper: Pretty in Pink, Pear Pizazz, Spring Fever SS Kit
Accessories: Scallop Edge Punch, Wide Oval Punch
(and a closeup for better detail)
Supplies:
Paper: Pretty in Pink, Pear Pizazz, Spring Fever SS Kit
Accessories: Scallop Edge Punch, Wide Oval Punch
Find more:
8 Photo Layout,
My Classes,
Scrapbooking
Tuesday, April 17, 2012
Simply Scrappin!
Happy day - I got a project done! No stamping, but I do love the ease and convenience of Simply Scrappin' Kits. This one is in the Occasions Mini and therefore qualifies for the SU-Only Challenge blog this week! And I got a little scrapbooking done too! Lots of good things out of one little project!
These are the back-to-school photos I took last summer on our town's Main Street and at a local park. The three on the second page are framed and on the wall. I don't know why the photo of the pages is so cloudy...its a rainy day so I took it with little natural light, but I don't understand why its weird like that. Anyway, here's my first scrapping for April!
Supplies:
Paper: Spring Fever Simply Scrappin' Kit
Accessories: Daffodil Delight thin ribbon
Find more:
6 Photo Layout,
Scrapbooking
Saturday, April 14, 2012
Spring Break Part 2
Still no paper crafting or stamping yet. Instead, here are the before/after photos of the rooms we've tackled this week. It was a LOT of work, and we crammed it into three days, but it is SO nice now! Yeay!!
You can see that the previous homeowners painted the chair rail, baseboards and trim around the closets really dark colors. I have yet to figure out why. We also replaced closet door knobs, a light switch plate, and installed a ceiling fan in the hottest room in the house, lol. Best of all, the kids each got to help with some of the work and were the first to paint the new color on their walls!
I will post an update when we get curtains made and things hung on the walls, but I am really excited about how much we've accomplished. The rooms both look so much brighter and cleaner, just by changing up the paint!
and I WILL stamp this coming week! *grin
Tuesday, April 10, 2012
Spring Break Part 1
Yep, its Spring Break around here! I did just get my Stampin' Success magazine, which I would love to drool over and create from...and I got a big order from Snapfish too! I would really love some play time, but that will have to wait!
This Spring Break we are working on some home improvement projects, which I will share later, haha. So for today, I'll share a quick project I did a few weeks ago, finally!
I don't know if you remember my love for the Nautical Expedition suite that Stampin' Up! offered last year in their mini catalog, but you can check out my projects HERE. I also loooved the amazing DP. So much so that I didn't want to cut into it! (I know some of you can relate...giggle) However, I also didn't want it to just sit in my box of paper and collect dust. I asked a friend if it would be stupid to hang the paper up...? A few friends thought that was a great idea! So finally I found some square 12x12 frames that were affordable (as in, less than $25 each!) and hung these in my main-floor bathroom!! YEAY!!!
Here's more of the bathroom, with the lighthouse theme I have in there.
How's that for thinking outside the box? *grin!
Find more:
3-D
Subscribe to:
Posts (Atom)