Monday, December 31, 2012

New Year- New Goals!

What do you like to make resolutions for? Are you a "word" person? I love lists and therefore I love setting a list of goals for each coming year. I have family goals, spiritual goals, health goals, business goals, craft goals, and goals to organize my time better. haha! They all kinda work hand in hand and are really just lists of baby steps to gradually change this or that about myself. One such goal is my yearly scrapbooking goal! Honestly I didn't even think of such a thing until I found the group on Splitcoaststampers.com, but since then I've been setting monthly goals and tracking my scrapbooking progress. I've said it before: scrapbooking is my first paper-crafting passion and it is one that is important to me. It keeps my memories written down and my photos organized and completes the story the photos begin. My kids love looking thru scrapbooks, my daughter had my childhood scrapbook out just the other night! Unfortunately, scrapbooking is one of the things that has been put on the back burner this year. I've had to put other things first, and that's ok... but I really hope to do more scrapping this coming year!

Last January I set a goal to complete 150 pages. I got 53 done. Which is not too bad- that's just over a page a week! So for 2013, I'm going to shoot for 75 pages. Its plenty more than this year, its less than other years, and as I love to believe: its 75 more pages done! And I never have a lack of events to scrapbook, hahaha, so that will not be a problem. I bet I have enough photos sitting in boxes right this minute to far surpass my goal. But I will be so darn happy if I get all 75 done by next New Years Eve.

And for a kick-start, I got this page done for a calendar project my mom asked me to do! (I promise it doesn't look QUITE that wonky on the printed result, LOL. It will work out nicely.)

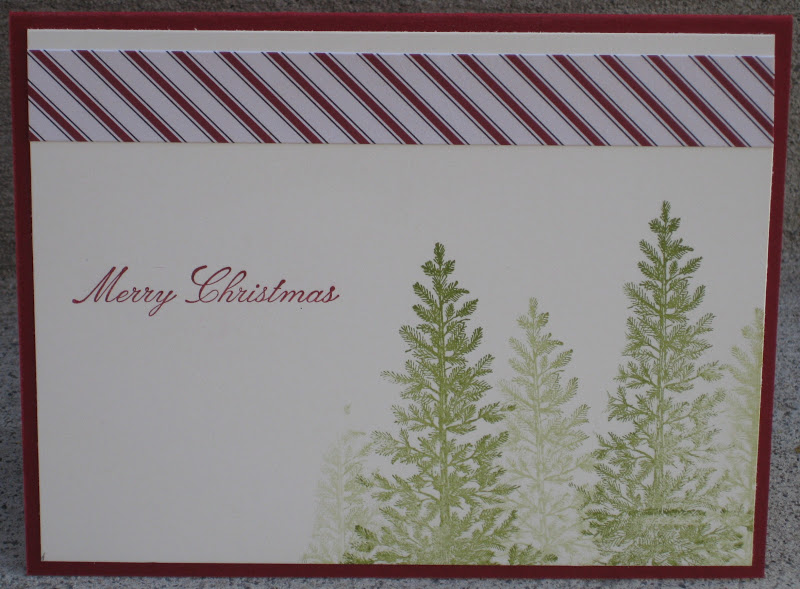
As a side note, I'm going to start tracking how many cards I make too. I know my cards aren't as layered and detailed as other people's, but I still spend time on them and am curious to see how many I make. What kind of goals are you setting?  

Saturday, December 29, 2012

Mojo Birthdays

I have two very dear friends who's birthdays closely follow Christmas. Being the awesome person I am (*cough*cough*) I often think "oh! I need to make them a card and get it sent..." and then forget all about it til the day of. I really hate that. SO! A few nights ago I took some time to put together some birthday cards!! Both cards used recent Mojo Monday sketches and products from mini-catalogs! And I really like both cards and think they're perfect for the person they were intended for!

This one uses the plaid DP from the Orchard Harvest package, in the Holiday Mini, and Mojo Sketch 272.
Supplies:
Stamps: Summer Silhouettes, Teeny Tiny Wishes
Ink: Raspberry Ripple, Lucky Limeade, Early Espresso
Paper: Island Indigo, Very Vanilla & Early Espresso card stocks, Orchard Harvest DP
Accessories: Linen Thread, 1 3/8 inch square punch

And this one uses DP from the upcoming Spring Mini (that means a sneak peek for you!!) and Mojo Sketch 270!
Supplies:
Stamps: Summer Silhouettes
Ink: Basic Gray, Cherry Cobbler, Certainly Celery & Wisteria Wonder
Paper: Very Vanilla, Basic Gray & Cherry Cobbler card stocks, Parker DP
Accessories: Paper Daisies, Cherry Cobbler seam binding ribbon, Neutral Buttons, Linen Thread, Scallop Edge Punch

Friday, December 28, 2012

Thank You Gift

Last week my husband and I had the chance to see an early screening of the new Les Miserables movie! The catch was that the theater was about 90 minutes away from our house, and we had to be there close to two hours before the show started. Also, its a really long movie...and it was on a school night. We had to figure out who on earth could or would watch our kids from 4pm-11pm...! A good friend offered to keep them that long, and not only did she feed them dinner, but also her husband stayed home with her kiddos while she brought my kids home to get them in bed on time! She had plenty of her own commitments going on the same night so it was really extremely kind for them to keep our kids for us that particular day. So, we got them a gift certificate to a movie and a restaurant, and made up our own babysitting certificate to thank them!

I used THIS sketch from the Clean & Simple blog to make this card to use as the gift certificate.
Supplies:
Stamps: Wonderfall, Teeny Tiny Wishes
Ink: Early Espresso, Cajun Craze
Paper: More Mustard, Early Espresso & Very Vanilla card stocks, Orchard Harvest DP
Accessories: Mat Pack, Word Window Punch

And the inside looks like this, in case you're curious:

Thursday, December 27, 2012

Calendars Part 2

And here are the rest of the calendar pages...September shows you what the whole, actual calendar looks like (and it keeps snowing so the lighting is funky) and November is my very favorite of all the pages. Yep, the grandparents love them! *smile
July

August

September
 
October
 
November

December

Wednesday, December 26, 2012

New Calendars!

Once again for Christmas I made our parents calendars! Of course I used My Digital Studio software. I love doing this becuase it allows me to show off our family but still change things up. This year they got identical calendars of just our family, which made it MUCH easier- I only had to design everything once! haha! I am very happy with how nicely it turned out!

Today I'll show you the actual cover and the first six digital pages. The pictures are not necessarily from the month they ended up in, they just fit the season or month they got put on! I was really just looking for good snapshots to display on the wall, more than how we actually spent the month. Enjoy!!
Cover, back and front together

January

February

March


April

May

June

Monday, December 24, 2012

Merry Christmas!

It's Christmas Eve and my house is bursting with excitement! The kids were up early this morning and it should be a fun day! We have cookies to frost for Santa, and traditions to keep!

I hope you have a very Merry Christmas day! I will be off celebrating with my family. I have these three by my side as we enjoy our Christmas morning at home, and visit other family as the day continues on. I hope that whatever your circumstances, you feel as blessed as I do today, as you share in the spirit of this day, bringing joy to others.


This is the photo card I made using My Digital Studio Software. I always loved including our school pictures in cards to grandparents, and aunts and uncles when I was growing up. I loved seeing the photo cards that would come to us and my mom would tuck them in our big family photo album when the season ended. Some years I have included traditional photos, some years I've included a photo as part of a Christmas letter. This year I have a family picture, plus the back-to-school portraits I took of the kids.
And I was able to still feature my business at the same time, haha! Talk about mass production! We mailed out 80 of these and still sent out stamped cards to other friends and family. I signed it on the back, behind the Merry Christmas block, and we included a little note with brief updates on our family.

Enjoy this week as we celebrate Christmas and New Years. Spend time with loved ones. Snap lots of pictures so you have plenty to scrapbook in the coming year! hee hee...

Merry Christmas!!

Friday, December 21, 2012

Teacher Gifts

Since Christmas break started this week, the kids needed to have a gift for their teachers! We had made some fudge but I needed a secure way of getting it to school, better than a little paper plate covered in plastic-wrap! I gave away all our holiday tins last year but I found these two boxes and thought I could make something cute!
So here's the before....
 and here's the after!
You know, the trouble with me and gift giving is that by the time I get the second package started, I'm too darn tired to care...can you tell which one was created first? mmhmm...I promise to work on that. How's that for a new years resolution?
ANYWAY, I pulled out my stash of retired Christmas paper and found some things I liked. I did the little brown box first, and then found this very pretty pattern to dress up the clear box all on its own! The boxes are filled with treats, a card from the kiddo, and a little note letting them know what the food is, haha!

Supplies:
Stamps: Greetings of the Season, Delightful Decorations
Ink: Real Red, Old Olive
Paper: Vanilla card stock, RETIRED Deck the Halls DP, Dashing DP
Accessories: Ornament Punch, Linen Thread

Wednesday, December 19, 2012

Christmas Cards- the end!

...this year, of course. There will be more next year, haha!
The last of my cards were sent out yesterday!! And honestly, we are 95% ready for Christmas! Now I need to focus on baking... How are you doing?? Anyway, here are the final cards, plus a little bit of instruction!
The three on the left are made up entirely of the stickers in the Merry Moments Simply Scrappin' Kit, and a bit of ribbon, a pearl, a few punches, and some greeting stamps.
The three on the right are all made using one stamp set, and even less accessories. But I had a request for embossing, so we used the top one for the class. (and the green one, but not the on with the Cherry Cobbler ribbon!)
Supplies:
Stamps: Greetings of the Season, Come to Bethlehem
Ink: Cherry Cobbler, Basic Gray, Versamark
Paper: Old Olive, Basic Gray, Very Vanilla, Whisper White, Merry Moments Simply Scrappin' Kit
Accessories: Crochet Lace Ribbon, Cherry Cobbler seam binding ribbon, Pennant Punch, Basic Pearls, Dazzling Details

So, you might be wondering how I used the whole wise men stamp but didn't emboss the star as well. This is how- you just pour the embossing powder carefully, and then tip it away from the star to dump off the excess. You can do this partial embossing with all sorts of images, you just have to be careful about it.
But, in this card, I didn't want the star just a flat gray, hanging out there, I wanted it to stand out! After all, the Christmas star is the real point of this image...! So I used the very fun Dazzling Details to make it stand out much better, and it does! It just takes a while to dry, so with a class, we did this one first, haha!
And here's a closeup, just for you!

Sunday, December 16, 2012

Scrap something random!

And to veer completely away from Christmas for just a moment, I made a new digital page today, Yeay!! Actually, it has everything to do with Christmas in that I had the chance to digi-scrap because my husband was helping my kids wrap my gifts, which was all super great! Since I was hidden away in my room, and printed photos were inaccessible, I had to pick some recent photos I knew were not sitting around waiting for me, and I thought these were fun!

Want to know the best part for you? This features NEW items from the upcoming Sale-A-Bration promotion!! I was able to pre-order the digital content disk, which holds everything offered with Sale-A-Bration!! This DP and ribbon are so bright and fun, and perfect for a fun day out with friends! I love it! And if you're not a digital fan, you can choose to get the DP or the ribbon with some fun buttons!

Thursday, December 13, 2012

Christmas Cards #3

Well my cards are finished- addressed and everything, just waiting for me to drive to the Post Office and get postage! How are your holiday cards coming along?
Here is the third installment of my Christmas Card class, just in case you're still looking for ideas! *grin
You can see many of these are the same card, they just look different with the variation of paper. Sometimes we drew the "string" or "hook" and other times I used actual Baker's Twine!
Supplies:
Stamps: Delightful Decorations, Greetings of the Season, Come To Bethlehem (words over tree)
Ink: Basic Gray, Cherry Cobbler, Old Olive
Paper: Very Vanilla, Cherry Cobbler, Basic Gray, Old Olive, Simply Scrappin' Kit
Accessories: Ornament Punch, Cherry Baker's Twine, Crochet Lace Ribbon

Monday, December 10, 2012

Tags for Christmas!

I must apologize for not posting more, blogger has been giving me issues and ya know, the holidays are busy!! Anyway, back to the projects! *grin

Remember a few weeks ago I had a workshop? My friend, the hostess, is interested in making tags for Christmas gifts. I demonstrated one and brought some other very quick tags to show. (They also made a nice little hostess gift for her!) My mom had attended a stamp camp several years ago now, and I was inspired by what I remembered from those tags, especially the cute candy one!
Tis the season for gift-giving, maybe you'd like some ideas for very quick, simple tags to attach to whatever it is you're giving! Also, it gives you a reason to stamp while crossing off that holiday to-do list!
Supplies:
Stamps: Greetings of the Season, Delightful Decorations, Sweets for the Sweet, Frosty Friends
Ink: Bashful Blue, Wild Wasabi, Lucky Limeade, Real Red, Basic Gray
Paper: Bashful Blue, Wild Wasabi, Real Red, Baja Breeze, Whisper White, Very Vanilla
Accessories: Whisper White & Cherry Cobbler Baker's Twine, Designer Label Punch, Ornament Punch, Tag Punch, Dazzling Details

Wednesday, December 5, 2012

Christmas Cards #2

Now that my Christmas Card classes are done, I can share close ups of all the cards we made. And just in case your cards are not done (mine will be ready to mail out today!) you just might find some inspiration! This set of cards uses roughly the same supplies, and yet each card has a different feel to it! Love that!!


Supplies:
Stamps: Greeting Card Kids, Come to Bethlehem
Ink: Basic Gray, Cherry Cobbler
Paper: Very Vanilla, Basic Gray, Cherry Cobbler, Merry Moments Simply Scrappin' Kit
Accessories: Regals Brads, Crochet Lace, Dimensionals

Monday, December 3, 2012

December is crafting time!

What kinds of gifts are you making this year? Stampin' Up! has SO many choices!! Here is are a number of ideas (with links) to help you cross off every one on your list!
  • Christmas cards! Make them traditionally with paper, or use My Digital Studio Software to mass produce cards!
  • Calendars! You can scrapbook a wall calendar traditionally, and you can have the pages bound at your local copy shop. Or, go HERE to see what I did last year using My Digital Studio! Or, check out any of Stampin' Up!'s desk calendar options!
  • Wall Art, made with your stamps, make a fun gift. Go HERE to see all sorts of project ideas I have created!
  • Photo books for the grandparents, or create a book around a special event, like a wedding or the birth of a new baby to enjoy!
  • Stamped Cookies for your neighbors, co-workers and friends! Or, buy the cookie stamps and give them to your favorite baker!
  • The Holiday Mini has some fun gift-packaging ideas, and there are more on page 161 of the Catalog!
  • Give a set of cards to someone who mails a lot of them! I'll be teaching a class soon for just that purpose! We'll make 12 seasonal cards - one for each month of the year!
  • Our Simply Scrappin' Kits and other Kits make great gifts for people who love to craft but don't have a lot of space or time. They're pre-packaged and some have everything they need to make some cute projects!
  • Stampin' Up's Punches, Wheels, and accessories make perfect stocking stuffers! (if you have a wide stocking, ink pads and small stamps fit well too!)
  • Stamps, Inks, Tools, and Software all fit nicely under any one's Christmas Tree!
Are you ready for the holiday? I'm sure not, but I have plenty of ideas brewing in my head!

Monday, November 19, 2012

Upcoming Card Classes!

I just needed to announce my upcoming Christmas Card class, for anyone interested! I made this flyer using My Digital Studio software. Click on it to see it bigger, but the details are also found below.
We'll be using the Simply Scrappin kit found in the Holiday Mini. We'll make 25 cards for $25 and I don't expect it to take more than 2.5 hours. I'll be holding my event on Friday, November 30th, from noon-3pm. And because I need to order the kit and prep the supplies for you, I'll need your RSVP and fee by November 25th. My friend Ellen will be hosting the same class the night before, in case you needed more information on that event.

And! Because I am enjoying the chance to show other ways to use your products, and because you'll take home some left over kit (if you choose to) here is a page I made with some of what was left over from my kit! These photos are from last Thanksgiving Day.
Supplies:
Ink: Bravo Burgundy Marker (coordinates nicely)
Paper: Simply Scrappin Kit, Very Vanilla & Basic Gray card stocks
Accessories: Cherry Cobbler baker's twine

Saturday, November 17, 2012

Super Quick

This is the scrapbook page I demonstrated at my workshop this week. I wanted to feature the new Divided Page Protectors, and a clear stamp. I also did a touch of watercoloring on the DP just to show that you can do that. These are truly the fastest pages EVER! ...they're just really hard to take pictures of...
Supplies:
Stamps: Pleasant Poppies
Ink: Elegant Eggplant, Wisteria Wonder
Paper: Wisteria Wonder card stock, First Edition DP
Accessories: Blender Pens

Friday, November 16, 2012

Now Scrap It!

Last night my friend hosted a workshop for me. We had a great time and now I have even more fun things to share with you! Our make n take was the card I shared here on Wednesday, and I wanted to illustrate how versatile our stamps and products are for all sorts of projects, especially for new crafters. I put together this scrapbook page ahead of time and brought it with. It uses the same stamps and DP, and a little of the same inks too. And yes, the acorns and the leaves on the side are all popped up on Dimensionals to help them stand out a little more.
Supplies:
Stamps: Wonderfall
Ink: More Mustard, Cajun Craze, Early Espresso, Lucky Limeade, Island Indigo
Paper: Very Vanilla & Cajun Craze card stock, Orchard Harvest DP
Accessories: Regals Brads, Mat Pack, Dimensionals

Wednesday, November 14, 2012

Another one!

This card is similar to yesterday's, I know, but I wanted to try another idea...and I think I like this one even more!! All the same supplies, but I swapped out the other card stock, and I added a button. Oh, and a different greeting set... okay, so not really the same, but close! hee hee hee....
Too bad I can't move a stamp straight, you'd think I could, but apparently not. *smile With the "thank you" I inked it up once, stamped it toward the bottom and then twice more for a faded look and just a little something different.
Supplies:
Stamps: Wonderfall, Teeny Tiny Wishes
Ink: Cajun Craze, Lucky Limeade, Early Espresso
Paper: More Mustard & Crumb Cake card stocks, Orchard Harvest DP
Accessories: Natural Buttons, Linen Thread, Glue Dots

Tuesday, November 13, 2012

Wonderfall!

I think autumn is over at my house, lol, but I got this new stamp set, paper, and a new ink pad, and I need a card for some upcoming events so I played around til I created this! And then you know what I did? I stuck it in the mail!! That's an important step that I know I forget sometimes, and wonder how many of you don't mail or give the cards you make. hmm.... LOL!
Aside from that, I love this Orchard Harvest DP from the holiday mini. I really do! ...and I noticed that I have bought an autumny or leafy DP every year for the last three years... I need to start using it up! haha!
And incase there are questions, the acorn is cut out and popped up on a Dimensional, and the oak leaf was masked and the other leaf was stamped over it. Not a technique I use often, but a simple one!
Supplies:
Stamps: Wonderfall, Itty Bitty Banners
Ink: Cajun Craze, Early Espresso, Island Indigo marker
Paper: More Mustard & Sahara Sand card stocks, Orchard Harvest DP
Accessories: Linen Thread, Dimensionals

Monday, November 12, 2012

Christmas weather, Christmas card!

Wow! I didn't share hardly anything last week because every spare minute I had was spent on prepping for a Christmas card class to be held Friday night.
However, I had to cancel at literally the last minute, because I could barely get out of my driveway, and frankly, the roads scared me! *Sad! The storm moved in Friday morning and we were supposed to get 1-3 inches of snow by Sunday afternoon. ....we had 3 inches by lunch time. By the time I needed to leave (around 430 pm) we had 5-6 inches, it was still dumping, and my parking lot complex and surrounding roads had not been cleared. Couple that with freezing temps, the sun setting around 5, and rush hour traffic, and you can imagine why I hesitated. Its just so darn disappointing when you have set a time for crafting, and especially with other people, and you have to cancel for something like weather! argh! 
The view from my window when my kids got home from school...
The bright side is, we were able to reschedule for later in the month (better late than never??) and I can now share with you a few sneak peeks for my Christmas card class...
These are all similar cards, and the class is designed using the Merry Moments Simply Scrappin' Kit (found on page 9 of the Holiday Mini).


Supplies:
Stamps: Come to Bethlehem, Lovely As A Tree
Ink: Old Olive, Cherry Cobbler
Paper: Very Vanilla, Cherry Cobbler, Old Olive & Basic Gray card stocks, Merry Moments SS Kit DP

If you would like to make these cards, my class will be at my house, held on Dec 1. Or you can schedule your own class if you hurry! *grin

Monday, November 5, 2012

Clean & Simple

For some reason this did not get posted when I made it, but I used this sketch HERE and made this card! Its not my favorite card, but it is a sunny card, which is nice for a thank you! *smile

Supplies:
Stamps: Four Frames, Teeny Tiny Wishes
Ink: Midnight Muse
Paper: Summer Starfruit & Whisper White card stocks, Patio Party DP
Accessories: Designer Label Punch

Saturday, November 3, 2012

Frame it!

Last week my husband had a training at work. For it, he was required to read a book, and then he had to do a short presentation on a chapter. He typed up this quote and asked me to make it look good, LOL!! I showed him some stamp sets that I thought might work and he picked this one. He bought the frames and I went to work!

The quote is printed onto some really nice fabricy paper in a package labeled "Resume Paper", lol. I cut a sheet of Whisper White card stock for the back paper, and stamped the globe image and the log book image onto it, tore the edges around the quote and sponged that with Crumb Cake ink. (click for a closeup) 

He was very happy with it, and his co-workers were impressed too! So nice to work together like that! *grin
Supplies:
Stamps: The Open Sea
Ink: Crumb Cake, Baja Breeze, Early Espresso
Paper: Whisper White card stock, Resume Paper
Accessories: Stamping Sponge

Friday, November 2, 2012

Divided Page Protectors!

Those on my email list have been told this post was coming...for months. *sad! This was my first purchase from the current catalog when it came out and the latest to finally play with, but I am excited to show this to you!

First, some info: I have seen Divided Page Protectors for a while in the general crafting world and thought it looked like a fun way to scrapbook - especially for those who are intimidated by scrapbooking. This concept allows you to only "scrapbook" a section, instead of a whole 12x12 page.
But there IS a slight catch...Personally, {and scrapbooking IS personal, you have to find what works for YOU} I scrapbook the photos I want to scrapbook right now but I like my books to be chronological. Which means, in order to use one page of these Divided Page Protectors, it has to work with the next event.
Solution? Use these sheets with photos that were printed "in order", or a big event that will take several pages, or even a single event book!

I started with a 4-day family reunion from last fall! I knew this would be a several-page-series so I printed off some of the photos and got started. (I know its hard to see- its really hard to photograph shiny plastic! but you should be able to click on the photos to see them larger...maybe that will help?)
page 1a:
page 1b:
See how nicely that works out?? I'm quite happy! I only scrapped a 12x6 inch section, big enough for a bit of mood-setting colors and stamps, and plenty of journaling, but not overwhelming or even all that time consuming!

And this next one is a really neat layout anyone should be comfortable with, just like all those photo albums we have stuffed with pictures from our old film cameras!!
Since this page is full, I will do the journaling on the facing page, which is fine because look at all the photos I just fit in here! The part of me that is obsessed with snapping pictures is very happy with a page like this, LOL!

And, to fit the back side of the above page protector, I looked at the photos I still need to print and selected the perfect ones for the next round of photo printing! I'll print 5 shots and journal and embellish the final slot! Isn't that easy?!
Is this simple enough to get YOU scrapbooking? Its only $5.95 to order 10 Divided Page Protectors from Stampin' Up! Find it on page 169 of the current catalog. It would make a fun Christmas gift for your scrapbook buddies too!!

Wednesday, October 31, 2012

Happy Halloween!!

These are the littles I sent off to the school parade today...
(he's Ash Ketchum, a pokemon kid, and she's Hermione Granger, Harry Potter's friend)
and here is a sweet little gift my friend gave me last week, using the cute Halloween product bundle in the Holiday Mini! Isn't that adorable?!
Supplies: Ghoulish Googlies Bundle (Googly Ghouls stamp set, Googlies, Ghoulish Googlies Kit - bag, tag & bakers twine!) Lucky Limeade ink 
Related Posts Plugin for WordPress, Blogger...