Friday, October 31, 2014

Happy Halloween!!!

Last night I took the kids to a Trunk-or-Treat at a local grocery store, so you get to see Pocahontas and a Minecraft Creeper a little bit early!
But you come for the stamping, don't you? I have tons of that today too! Last weekend I was at my parents house, and my mom had specifically asked me to bring any Halloween stuff I had, so that she could make lots of cards to mail out. Her mother always did before passing away, and her aunt does too, so my mom is carrying on the tradition! We set out the stamps we had (current and very old) and pulled up Pinterest and went to work! I've included links to where the inspiration came from if we found it online...Enjoy these no-calorie Halloween treats!

I'm starting off with maybe my favorite- this one was my mom's idea- she saw the "witch parking" words and wanted to do a fence with a bunch of brooms leaning against it! Clever, huh?!

Supplies: Tee Hee Hee stamp set, old set for fence, Lucky Stars embossing folder

Supplies: Holiday Home stamp set, Good Greetings stamp set, Homemade Holiday Die
Inspired by THIS

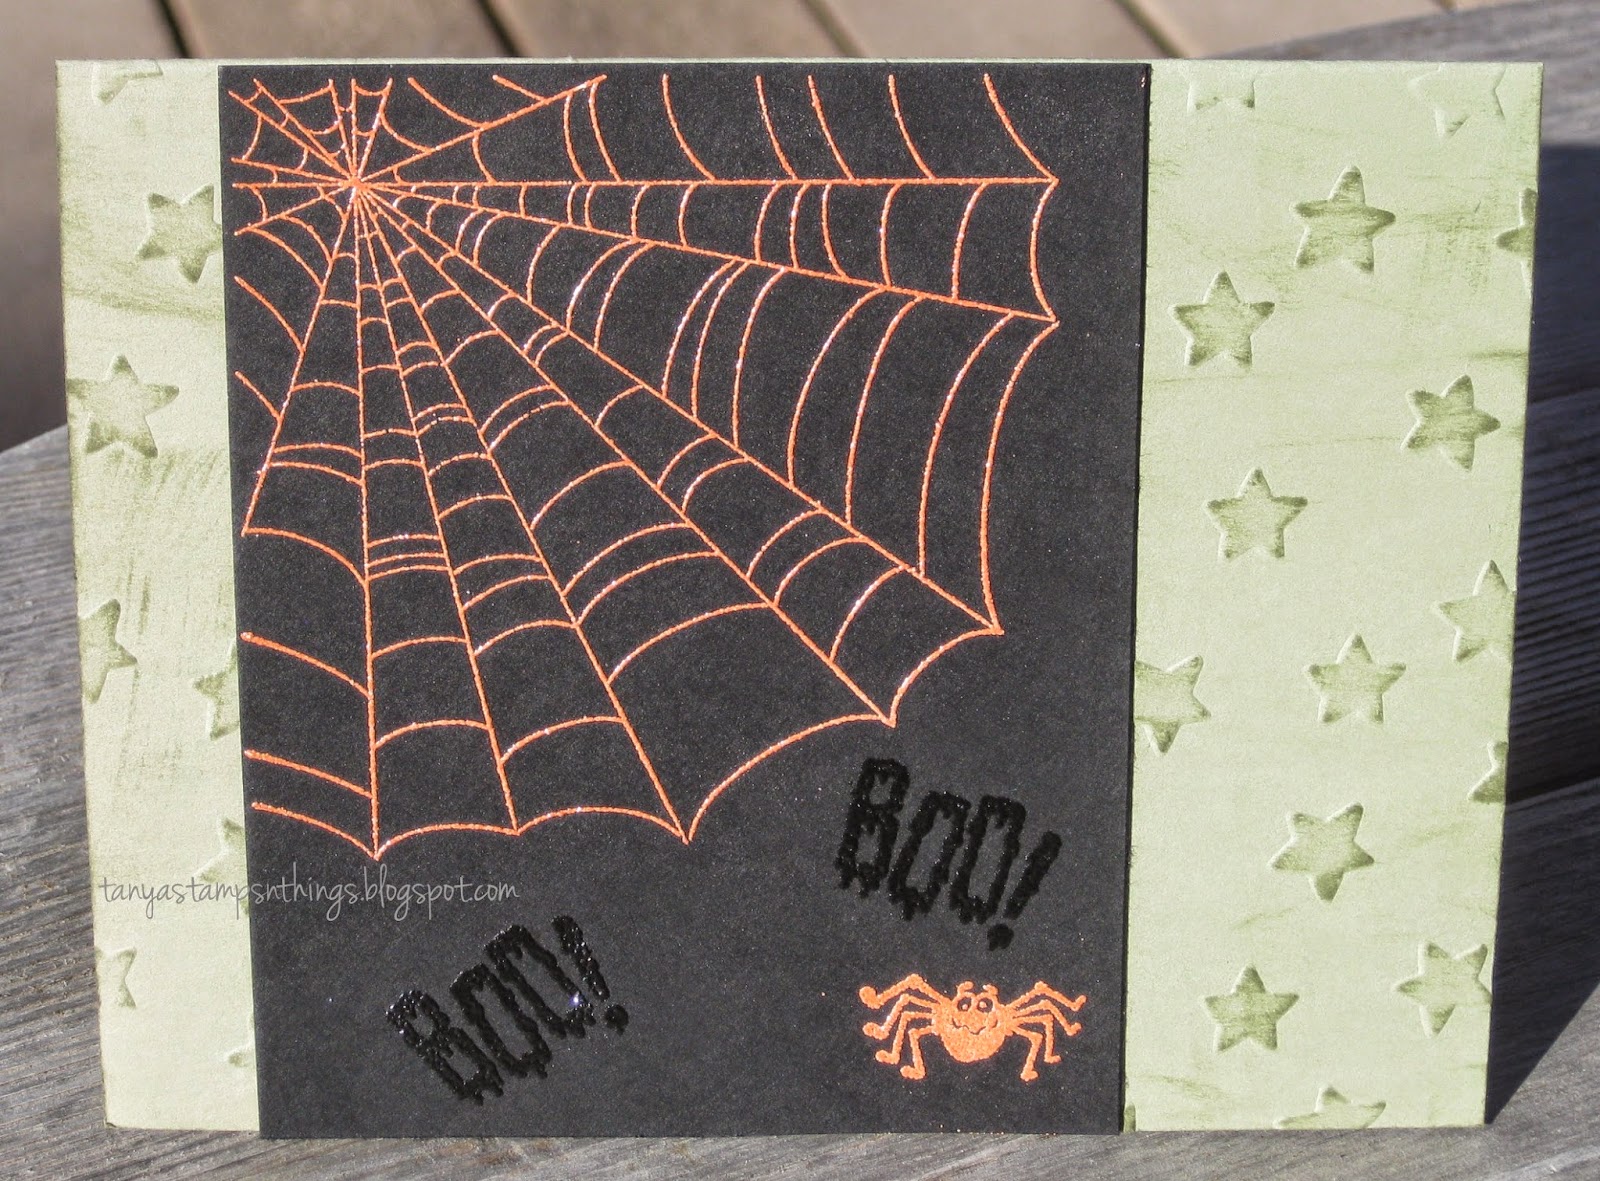
Supplies: Lucky Stars embossing folder, old stamp set

Supplies: Tee Hee Hee stamp set, old stamp set for "smoke", Lucky Stars embossing folder

Supplies: Holiday Home stamp set, Good Greetings stamp set, old stamp set for tree, Homemade Holiday Die
Inspired by THIS

Supplies: Holiday Home stamp set, Homemade Holiday Die
Inspired by THIS

Supplies: Tee Hee Hee stamp set

Supplies: Tee Hee Hee stamp set, old spider embossing folder

Supplies: old stamp set, old spider web embossing folder

Supplies: old stamp set

Supplies: old stamp set (I wanted the words pale in Versamark "under" the spider, which I then heat embossed...apparently the Versamark-ed words weren't dry when I put on the embossing powder! Oh well....)

Supplies: two old stamp sets, Lucky Stars embossing folder

Supplies: Tee Hee Hee stamp set, Lucky Stars embossing folder
Used THIS sketch

Supplies: Good Greetings stamp set, old stamp set, old spider embossing folder

Halloween can be a lot of fun, huh? Enjoy the day, whatever you're doing!

Thursday, October 30, 2014

Other People's Projects!

Not a lot of crafting going on at my house right now, I'm in the middle of other kinda huge projects {bottling pears, family events, cleaning out storage and selling stuff...}, oh, and it's the week of Halloween.... haha...
However, back HERE I shared my card that I was sending to a list of other demonstrators, for a Cards in the Mail swap, so today I thought I'd share the six Halloween cards I got back! Just in case you need an idea for a lunch box tomorrow, or a neighbor gift...!
I have the designer's name on each card, and I wish I had a blog link for everyone but I don't even know if they all blog or not! So you can enjoy it here!
 both sides of the same card...
Supplies: Holiday Home stamp set, Homemade Holiday Die, Confetti Stars Punch, Lucky Stars Embossing Folder, Circle Card thinlit die

Supplies: Holiday Home stamp set, Work of Art stamp set, Homemade Holiday die

Supplies: Making Spirits Bright stamp set, Lucky Stars Embossing Folder, Motley Monsters DP

 again, two sides...
Supplies: Tee Hee Hee stamp set, Chevron Embossing Folder, Circle Card thinlit die

Supplies: Bootiful Occasions,Perfect Polka Dots embossing folder

Supplies: Homemade Holiday Die, Holiday Home stamp set

Supplies: Fall Fest stamp set, Holiday Invitation stamp set, Fun Fall framelits, Lucky Stars embossing folder

Tuesday, October 28, 2014

Project Life Giveaway!!

I have to let you know about this, incase you don't follow me on facebook!!


If you've perused our catalog since June then you've seen the Project Life items. (check pages 188-189) Maybe you've even ordered them and used them yourself! I am especially excited about the Christmas Project Life things. Well, here's a chance to WIN all or some of the Project Life products!! Just go HERE and fill out the form to enter!!
And you can watch this fun video to see how it works!

Monday, October 27, 2014

MDS Monday 88

Today is my last day as guest designer with the MDS Monday blog, and I have truly enjoyed it!

Jeanna designed the sketch and asked for colors and embellishments- and I used 'em! Check it out HERE. I liked the sketch and made it work for this day we spent with friends who live far away. Don't you just love those friends where all the adults get along and have great conversation, and the kids match up with your kids in age, gender and interest? I really do, and that is why this page needed created.
Supplies:
MDS: 2014 SAB Content (cord), Button Bouquet, Ice Cream Parlor button, Paper Daisies download, Sunny Day DP (orange hearts), Lemonade Stand Content (chevron DP), Big Top Birthday DP (background stripe)
Fonts: Janda Stylish Script (title), Berlin Sans FB (journaling)

You should definitely play along! This is a fun one to play with lots of elements with! And remember- with MDS you can scrap anything you like, any time- all you need is your computer!

Friday, October 24, 2014

Blackberry Flowers

Quick post tonight...
This week's class was a ton of fun and now I'm finally sharing the last pretty card:
(it was based on last week's Freshly Made Sketch)
Supplies:
Stamps: Bloom with Hope (hostess only)
Ink: Blackberry Bliss, Hello Honey
Paper: Whisper White & Blackberry Bliss card stocks
Accessories: Blackberry Bliss Satin ribbon, Blender Pens

It was really simple, but included some steps. I stamped the flowers in Blackberry Bliss and then used the Blender Pens to make them look watercolored. Then I made some post-it note masks to lay over the flower blossoms, and then stamped the Hello Honey leafy image over it to make it look "behind" the flowers! Then we just added a bit of ribbon, and a greeting- and tada!

Thursday, October 23, 2014

Neighbors!

Today is my card class at my friend's house! And here is the 4th card we are going to make!
I happen to be very excited about this card! I used the current Freshly Made Sketch for the layout. My last house card, after seeing it on my blog I felt like it needed something...well, it needed a ground to sit on! So this time I made a point to have grassy lawns! haha... I used ink pads and blender pens to shade in the houses, and the door, but markers of lighter shades to do the roofs and other details.
Supplies:
Stamps: Holiday Home
Ink: Early Espresso, Soft Suede, Smoky Slate, Cajun Craze; Markers: Crushed Curry, Soft Suede, Smoky Slate
Paper: Sahara Sand, Cajun Craze, Mossy Meadow, Whisper White, Color Me Autumn DP
Accessories: Hexagon Punch, Word Window Punch, Big Shot, Homemade Holiday Die, Blender Pen

Wednesday, October 22, 2014

October's My Paper Pumpkin 1

Have you gotten your My Paper Pumpkin kit for the month? Mine arrived this week. To be honest, I wasn't thrilled about the project, because I can basically count on one hand the times I've enjoyed creating 3-d paper projects BUT! these are super easy to put together and all ready for you to give away treats to people! And I really did like the stamps that come this month...!
Better than that, the boxes came with a flyer reminding us that there is a Pinterest page full of alternative ideas for using the kits...and! I created my own alternative idea for my class this week! Here is my card...
Supplies:
October My Paper Pumpkin Kit, Old Olive card stock, Paper Trimmer

And, if you'd like to see the kit in action the way it was designed, check out this video here: 

I'll keep creating tho, and share more later!

Monday, October 20, 2014

MDS Monday #87

Happy Monday to you! It's another week that I get to join the MDS Monday challenge blog! This was a fun challenge! Once again the hardest part was choosing just one photo!!
This week there was this fun sketch with a lot of squares to be filled with colors and paper and zoomed in differently- which I did. Also a challenge to fill some of the squares with one photo, which I also did! What do you think?
Supplies:
MDS: SAB 2014 content: Accessory Cord Pack (twine & bow), Pocket Full of Posies DP, Tag Punch
Font: Throw My Hands Up

You should come play along too! The link is open til noon on Saturday (find it HERE) and you'll have one more page done! *grin

Friday, October 17, 2014

Falling Leaves

Here is another card for next week's classes...this time using the Clean & Simple sketch, and featuring the Big Shot!
The three leaves were cut out of the Color Me Autumn DP. I loved the watercolory look of those "solid" sides. Also, can you see the brown shadowy spots on the card? I laid the peice of DP down, after the leaf was cut out, and sponged some Crumb Cake ink right onto the card for a little extra dimension!
Supplies:
Stamps: Good Greetings, Hardwood
Ink: Early Espresso, Crumb Cake
Paper: Crumb Cake, Color Me Autumn DP
Accessories: Big Shot, Autumn Bigz Die, Old Olive baker's twine

Thursday, October 16, 2014

Happy Flowers!

Today I have a bright happy card for you! This is the first time I've gotten to play with the set Good Greetings, which is pretty sad since its only available for another couple of weeks! The stamp set is free to anyone who hosts a $300 party or more, and it is perfect for every occasion you need a card for!
I used the current Nacho Average Challenge for the sketch. I "watercolored" the flowers by just stamping them in Blackberry Bliss ink and using Blender Pens to color it. and! I used some inspiration from my blogging friend Susan to put the flowers on the edge of the paper and partially cut them out! I love that look! however...I also remembered why I've only done it once...its kinda tricky for me! haha! Or maybe its just these flowers that were tricky, I'm not sure, but I took notes to remember how next time, hahaha...
Supplies:
Stamps: Bloom With Hope, Good Greetings
Ink: Blackberry Bliss, Daffodil Delight, Mossy Meadow marker
Paper: Whisper White, Park Lane DP
Accessories: Blender Pens, Blackberry Bliss stitched satin ribbon, Glue Dots

So, for the future, I stamped the flowers on sides of a paper, obviously larger than I wanted it to be. Then I used the paper trimmer to cut almost to the flowers. I fussy cut around the flower outside of that line, and used the scissors to reach the edge of the flowers. And where the stem still shows? yeah, that was pretty tricky!!
But- the result is gorgeous and that makes it worth it!
Have you tried anything new lately?

Wednesday, October 15, 2014

Truly Grateful

There is a card design floating around Pinterest...this one?...and it is based upon a card in the latest demonstrator magazine. Did you know we get a magazine every other month FREE from Stampin' Up! full of ideas for us demonstrators to use in our businesses!
While I didn't get the set they featured (For All Things) I used a stamp set I have, and the same colors and accessories, to make basically the same card...I love inspiration like that!
Supplies:
Stamps: Truly Grateful
Ink: Crumb Cake, Blackberry Bliss, Crushed Curry
Paper: Whisper White
Accessories: Color Me Autumn Washi Tape, Gold Buttons, Linen Thread, Glue Dots

It is a no-layer card, almost entirely flat, and completely mail-able! And it doesn't look too plain!! And that is great since this is one of the cards we'll make at my Thankful Card Class next week!

Tuesday, October 14, 2014

90 Years

I haven't gotten to create a whole lot this month, because I was focused on a different kind of project.
My father-in-law turned 90 this month, and there was a huge open house for friends and family to come visit!
(and no, I am not even close to old enough for that...my husband is 5 years older than me, and he was the baby of the family, by a long shot! My parents aren't even 60 yet!)

As part of the party prep, each of the children were asked to put together a display focusing on a facet of his life. The displays were centerpieces for round tables, where people were supposed to sit and visit and snack. We were assigned "family life and travels". I was overwhelmed for a minute but then I decided to find as many photos as we could of him enjoying his family life and travels, and display them! (The lighting in the large room we used was super lousy, and I've edited the photos the best I can) This is what we came up with:
the front
the back

My husband scanned in just about every picture we could find in that topic, and narrowed it down to 90 shots. I edited and printed them, and we framed a few (propped up against the vase) but most of the pictures were hung on the tree, back to back. The branches were stuck in a glass vase, and the vase was full of rocks to keep it stable. We had a map of the national park my inlaws have gone to many, many times, unfolded, on the table (in the first shot), and laid a plastic round tablecloth over it to keep it protected.
And this is what it looked like most of the evening. Yeay!
Its always nice to see your hard work appreciated, haha!

And in case you are looking for ideas for a similar project, the other displays were really cool too- I loved seeing the different ideas people had!
The welcome table: (courtesy JoAnn & girls)
Heritage: (courtesy Paul)

Church life: (both sides- courtesy JoAnn & kids)

Farming and gardening: (courtesy Pam)


 Mechanic & DIY'er "from before DIY was a term!": (courtesy Bruce)

 Childhood & Navy: (all three sides - courtesy Dawn)

 Hat Collection: (courtesy Jaimee)

 Career at the local Air Force Base: (courtesy Ryan & Nikia)

90 years is a big deal! *grin

Monday, October 13, 2014

MDSM86 & Technique!

Happy Monday to you! Hope your weekend was a good one! Today, once again, joining the design team with the MDS Monday blog! *grin
Oh my goodness, this was something fun to try! This is what I love about the MDS Monday challenges- they give us a chance to try something we (well certainly *I) would never have thought of!
In this case, Heidi asked us to try the Herringbone technique, and wow, I love the page it created!! All of the samples turned out awesome!
Supplies:
MDS: Extreme Elements stamp, Pocket Full of Posies DP, Square punch, SAB 2014 (twine & cork scallops), Lemonade Stand content disk (stitching) Hello Honey & Basic Gray colors
Font: 1942 Report

I'll be honest- it was a lot more time consuming than I generally like to spend creating. But you know what? Stretching ones self definitely gets great results! Not to mention it's so much fun! Be sure and check out this weeks challenge, watch the instruction video and see what YOU can create! Then link it back so we can all enjoy your work too!

Thursday, October 9, 2014

Treats for Halloween!

The September My Paper Pumpkin kit will definitely come in handy in a couple weeks! I wanted to share it today so that anyone interested that is not a current subscriber, can sign up and order the missed kits in time to enjoy it!!
Do you take treats to neighbors or co-workers or friends or in a child's lunchbox or in a husbands briefcase (or lunch box...), or anything at all? If so, this is the perfect kit for you! It has cute Halloween stamps and then if you notice, the "eat something sweet" could really be used any time! The striped and polka dotted burlap bags would work for any season too! Just make a cute tag with stamps (and your Big Shot!) and you're set!
Obviously these aren't filled yet, but they could each hold a few 'fun size' candy bars, a wrapped brownie, a few cookies...whatever you like to give!
There are six bags in the kit, the cute clothes pins, orange sequins, black thread to tie the bags closed, the fun stamp set and the black Halloween images I used are stickers- but when you run out of those you still have the stamps! How fun is that?
You know what else? These tags would fit nicely on a scrapbook page too! I'm hoping to put one together very soon...!!!

Wednesday, October 8, 2014

Calling All Heroes 1

I was really hoping to post every day this week, but since this is the only day I get to stamp, I'm posting the first thing I got done! (it's not for a lack of creative projects, it's just that I can't share them yet!) And, since I plan to make several projects using this fun stamp set, I titled it #1, ha...

For this card, I used the latest from Viva La Verve- both the sketch and the color challenge! I almost never use color challenges becuase they always challenge me too much, haha, and I rarely like the finished product, but this set of colors worked well with this stamp set, so I went with it! I also stuck with the newest In Colors! The old Batman tv show has Batman in a blueish costume, so there you go! I used the Lost Lagoon marker to add the "ears" and I really like the result!
Supplies:
Stamps: Calling All Heroes
Ink: Lost Lagoon, Tangelo Twist, Hello Honey, Basic Black
Paper: Hello Honey & Whisper White card stocks
Accessories: Dimensionals

Tuesday, October 7, 2014

New Toys!

Recently I joined a group of demonstrators who swap cards through the mail. I decided to make something with my newest toys for my card! I got the super fun Hexagon Hive die and the coordinating Honeycomb Hello stamp set. I stuck with last year's In Colors and used the new sequins as little accents! and I really like how it turned out!
Supplies:
Stamps: Honeycomb Hello
Ink: Coastal Cabana, Crisp Cantaloupe, Baked Brown Sugar
Paper: Whisper White & Pistachio Pudding
Accessories: In Color Sequin Asst, Big Shot, Hexagon Hive Die, Dimensionals, Glue Dots

Since I had to make several cards, I created the first one and then attacked it assembly-line style. First, I cut a mask out of printer paper so I knew where to stamp, without getting any ink on the part I was using as the card front. Then I used three post-it notes to hold it down in place.
After I was done stamping, I cut all the Pistachio pieces out. (and now have a baggie full of Pistachio hexagons I need to find a project for, hahaha...!) I popped them up on Dimensionals and finally added all the sequins with Glue Dots. I used only the Baked Brown Sugar and Crisp Cantaloupe sequins, keeping all the stars on the card one color and the circles the other. Fun huh? 
Related Posts Plugin for WordPress, Blogger...